A popular feature for most modern business sites is to provide a listing of products, people or locations. Today we’re going to look at the Pods plugin for creating custom post types to represent these listings, and display and dynamically filter them.
Pods is a framework that allows us to easily create Custom Post Types, you may be already familiar with two of the built-in WordPress post types “Posts” and “Pages”. Pods enables us to create and manage new types which can represent whatever we like, and create and manage them as easily as editing a page or writing an article! Trust me, you will get the hang of it in no time at all!
Installing Pods

Step 1 is to install Pods, from the WordPress dashboard select Plugins > Add New.
In the search box enter: Pods
After a moment of searching you will see the Pods plugin, click Install Now, and then Activate to complete the installation.
![]()
![]()
Defining Our Custom Post Type
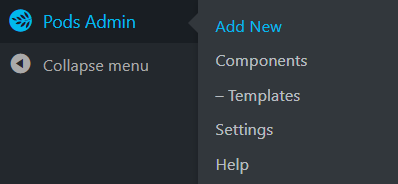
You will see a new Pods Admin Menu Item in the left side of the Dashboard, hover over it and click Add New. If you do not see it click the home icon to refresh your page, or go back and make sure you have installed and activated the Pods plugin on the plugins page.
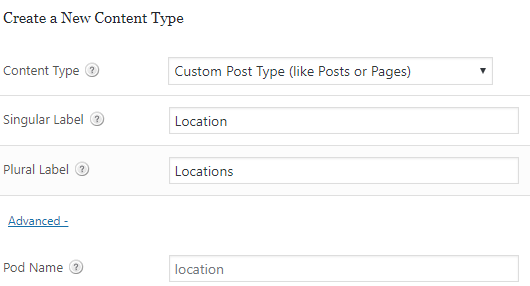
We’re given two options here, to Create New or to Extend Existing. We’re going to click to Create New. We’ll leave Content Type as Custom Post Type, but we’ll enter some labels for the Post Type we’re creating, for this example we’re going to use Location to represent our business locations. We’ll enter Location and Locations for the singular and plural label respectively. These labels can use as many words as you need to describe your example, so we’ll go ahead and review the Advanced auto-generated Pod Name, and potentially specify a simpler internal name to make our pod easier to work with. We’re happy with location (note the lower case) and we’ll go ahead and click Next Step.
We can now start defining what makes up our Location, so we’ll click Add Field, everything automatically has a Title, so we’ll add a Manager field and choose Save Field.
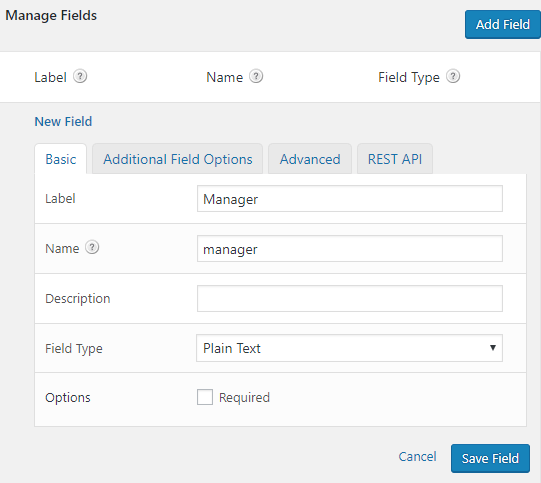
We used the default of Plain Text, but we’ll do the same thing to add a Phone Number (which we’ll Name telephone rather than the suggested phone_number) as a Phone Field Type; an Email Address (which we’ll Name email) using the Email Field Type, and then an Address using the WYSIWYG (Visual Editor) Field Type.
We can also add “File / Image / Video” fields such as a picture of the Location, Downloadable Location Maps, Menus – whatever you need, let your imagination go wild for a moment.
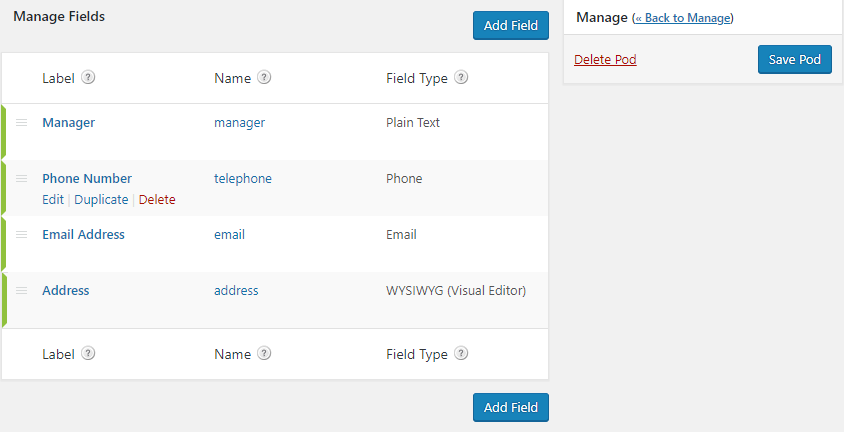
Once you have Saved your fields, you should see something like the above, so we will click Save Pod to save our work!
We’re going to do one more thing to protect ourselves from making mistakes later:
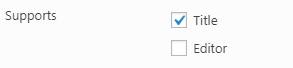
Click the Advanced Options tab and turn off Supports: Editor, but leave Supports: Title enabled. Ensure you then click Save Pod before continuing.
Creating Our First Custom Posts

We can begin to create some locations –
hover over Locations on the left navigation,
then click Add New to create our first location.
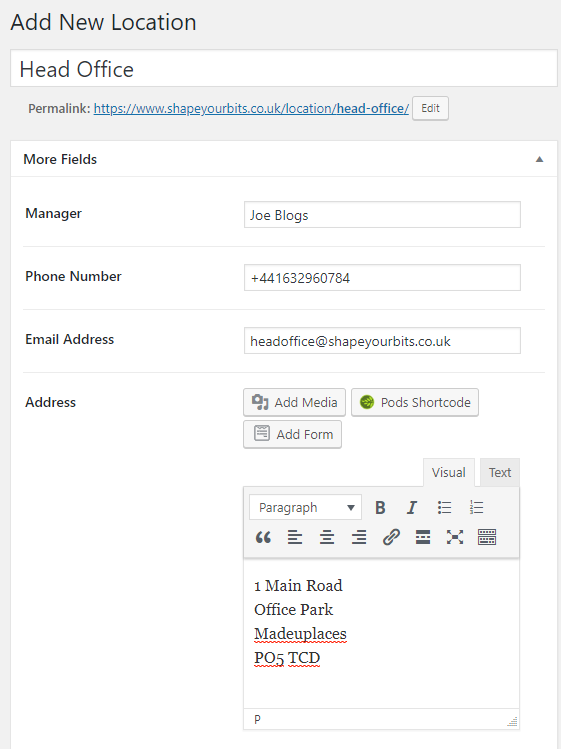
You will notice as soon as you have filled in the title that the permalink URL for what you are creating is shown, fill in the other fields for your first location then click Publish.
If you were to view the location you may be surprised to only see the title of the Location displayed.
We need to tell our website how to display the other information associated with our location. Hover over Pods Admin in the dashboard left navigation and click Templates then click Add New. We’ll name it Location Details and copy and paste the following code into the Template.
<div id="location">
	[if manager]<div class="label">{@post_title} Manager:</div>
	<div class="location_manager">{@manager}</div>[/if]
	[if telephone]<div class="label"><div>Phone Number:</div>
	<div class="location_telephone">{@telephone}</div>[/if]
	[if email]<div class="label"><div>Email Address:</div>
	<div class="location_email">{@email}</div>[/if]
	[if address]<div class="label"><div>Address:</div>
	<div class="location_">{@address}</div>[/if]
</div>
The template system provides a nice colouring system which highlights the different logic going on within the template. Adjust the above template to fit your own field names.
We have a HTML div containing the details of the location, each field only showing up if we have entered some data for it – earlier we didn’t make any of our fields required, but we could have done that when creating or editing a field.
There is also what Pods call a Magic Tag this enables us to refer to the fields we created earlier using {@field_name}. There is a useful Reference on the right to see what field names we chose for our Location. Some field types will have additional options, which we will look at briefly later. Once we’re done entering the template information we’ll click Publish.
Now we will need to associate our Location Details template with our Location post type. Click Edit Pods, hover over Locations and then click Edit.
Click Auto Template Options check Enable Automatic Pods Templates for this Pod. Single item view template should already be set to Location Details so click Save Pod.
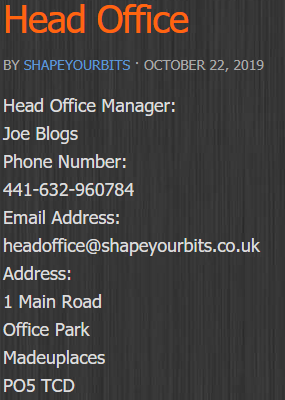
If you now open Locations, hover over your created Location and click View, you will see the fields we created.
The styling of the data can come later via customising your theme, for now create a few more locations by hovering over +New and then clicking Location and entering some data into the fields, clicking Publish each time.
Assigning a Custom Taxonomy
We now have a few locations with some basic information, next we will add some shared classifications, called taxonomies, which can then be used to filter across the locations based on the Region and the Facilities provided.
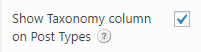
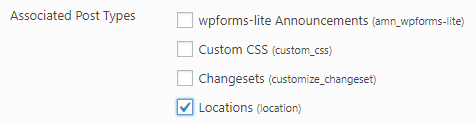
Hover over Pods Admin and click Add New. Click Create New and this time select Content Type: Custom Taxonomy, enter the singular label Facility, plural label Facilities and click Next Step. Our facilities do not need any fields, they already have a title, however we do want to associate them with Locations, click Advanced Options and check the box next to Associated Post Types: Locations and on the Admin UI check Show Taxonomy Column on Post Types then click Save Pod. Repeat this process to create a custom taxonomy singular: Region plural: Regions and again associate the post type with Locations and Show Taxonomy Column on Post Types and then Save Pod.

Once you have these set up let us go back into Locations and hover over a location and then click Edit. You will see the new Facilities and Regions Taxonomies on the right side.
We will add a Board Room to the facilities of the location, click + Add New Facility then enter Board Room and click the Add New Facility button.
Next add the location to the West Coast Region. + Add New Region then enter West Coast and click the Add New Region button. Finally click Update to save your changes. Add some regions and Facilities to a few Locations, whilst ensuring that a couple of Locations share the same Region or same Facility. If the region/facility already exists for a given location you can click the checkbox and click update.
Now we can create our Locations Table template listing the locations to be filtered. Hover over Pods Admin and click Templates then click Add New. Call it Location Table then copy and paste the following code into the Template and click Publish.
[before]<div id="pods">
<div class="labels">
	<div>Location</div>
	<div>Manager</div>
	<div>Phone Number</div>
	<div>Address</div>
</div>[/before]
<div class="pod_container [each region] location_region_{@slug}[/each][each facility] location_facility_{@slug}[/each][if address] location_address[/if]" id="location_{@ID}">
	<div class="pod_name">{@post_title}</div>
	<div class="manager">[if email]<a href="mailto:{@email}">[/if][if manager]{@manager}[else]{@email}[/if][if email]</a>[/if]</div>
	<div>[if telephone]<a href="tel:{@telephone}">{@telephone}</a>[/if]</div>
	<div class="pod_text_content">[if address]{@address}[/if]</div>
</div>
[after]</div>[/after]
We use the before and after sections to wrap our table with a HTML div and to include the column headings for the rest of the table. In regards to displaying multiple taxonomies {@taxonomy_name} will give you the selections in a human readable form, alternatively using each will loop over the selected taxonomy items.
Anything we want to filter on needs to be part of the the pod_container’s class attribute, the code will use this to determine which rows to hide which do not meet the selected filters. We use [each taxonomy_name] location_taxonomy_name_{@slug}[/each] to add a class for each of the location’s associated taxonomies.
Filtering Using a Custom Taxonomy with the Pods Shortcode and jQuery
The following code can be put into a WordPress shortcode block to include filters on the page, we use the Pods shortcode to output each of the regions and the facilities that we have created. The filtering will adjust to new fields, simply match the field names you have used in the custom post type or names of the custom taxonomies as appropriate.
<div class="filters"><select id="location_region"><option value="all">All Regions</option>[pods name="region" orderby="term_order"]<option value="{@slug}">{@name}</option>[/pods]</select><button id="location_address">Has Address</button><select id="location_facility"><option value="all">All Facilities</option>[pods name="facility" orderby="term_order"]<option value="{@slug}">{@name}</option>[/pods]</select><button id="filter_reset">Reset</button>
</div><script>
function filterPods(filter){
if(filter==="filter_reset"){
	jQuery('#pods div.pod_container').removeClass('hidden');
	jQuery('.filters select').val('all');
	jQuery('.filters button').removeClass('clicked');
	jQuery("#filter_reset").removeClass('suggest');
}else{
	jQuery('#pods div.pod_container').removeClass('hidden');
	jQuery('.filters select').each(function(index){
		filterPodsOn(this.id,jQuery(this).val());
	});
	jQuery('.filters button.clicked').each(function(index){
		filterPodsOn(this.id);
	});
}
}
function filterPodsOn(filter,filter_value){
if(filter_value!=="all"){
	if(filter_value===undefined){
		jQuery('#pods div.pod_container').not('.'+filter).addClass('hidden');
	}else{
		jQuery('#pods div.pod_container').not('.'+filter+'_'+filter_value).addClass('hidden');
	}
}
if(jQuery('#pods div.pod_container').not('.hidden').length===0){
	jQuery("#filter_reset").addClass('suggest');
}else{
	jQuery("#filter_reset").removeClass('suggest');
}
};
jQuery(function(){
jQuery('.filters select').change(function(){filterPods(this.id)});
jQuery('.filters button').click(function(){jQuery(this).toggleClass('clicked'); filterPods(this.id)});
});
</script>
<style>
@keyframes blink {
   50% {
		border-style: dotted;
		background: #FF0000;
		border-width: 2px;
 		color: #ffffff;
	}
}
.filters {
	margin-bottom: 10px;
}
.filters select {
	display:inline;
	background-color: #000000;
	color: #E2E2E2 !important;
	height: 3em;
}
.filters button {
	background-color: #ffffff;
	height: 3em;
}
.filters button.clicked {
	border: solid #ffffff 2px;
	background: #000000;
	color: #ffffff;
}
.filters button.suggest {
    animation: blink .5s step-end infinite alternate;
}
#pods {
  display: table;
  border-collapse: collapse;
}
#pods .labels, #pods .filters {
	display: table-header-group;
	color: #0099ff;
	font-weight: bold;
}
#pods .labels div {
	display: table-cell;
	width: 300px;
	padding-bottom: 6px;
}
#pods .pod_container {
	display: table-row;
	border-top: dotted black 2px;
}
#pods .pod_container div, .pod_container h4 {
	display: table-cell;
	padding: 8px 2px 2px 2px;
	vertical-align: top;
}
.pods_text_content {
	padding: 3px;
}
.hidden {
	display: none !important;
}
</style>[pods name="location" template="Location Table"]
orderby=”term_order” is actually optional but I recommend the plugin Category Order and Taxonomy Terms Order if you want a non alphabetic ordering, for example numerical order, or with popular items at the top of the list.
There are two type of filters that we have created, a drop-down list using a select, and a toggle using a button. A toggle button would usually be whether a field is provided for a given location, whereas a drop-down would be for selecting one of the shared taxonomies, but you could just as easily filter out all the locations without board rooms by specifying the board-room slug within the button id as follows.
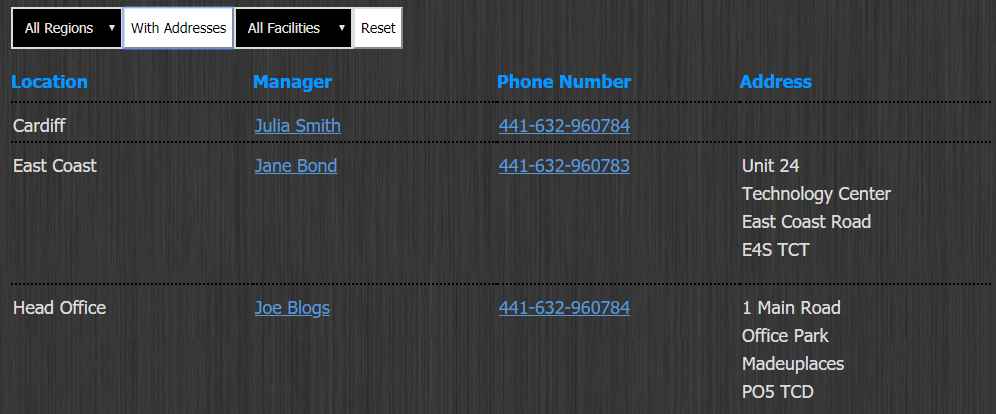
<button id="location_facility_board-room">Board Rooms Available</button>What it all looks like put together:
The Pods Shortcode is a powerful and easy way to display custom post types, and can be leveraged to display a subset of items depending on various parameters, including things such as pagination. You will want to read the shortcode documentation if you are looking to expand this solution further for more tips and tricks.
This quick code example ought to grow with your business needs until you require multiple thousands of results being pulled from the system we have created, at which point you will continue to leverage the post types and taxonomies we have defined to drive a more dynamic and technically involved solution.
We’re content management experts, if you need help or advice we’re just an email or telephone call away.
Comments
3 responses to “Front End Filtering of Custom Post Types using WordPress Taxonomies and the Pods Plugin.”
Please note there was a bug reported with 2.7.20 of pods. Suggest using version 2.7.15 of pods until 2.7.21 is released. See for the live status: https://github.com/pods-framework/pods/pull/5672#issuecomment-628732988
This has now been resolved in the main branch as 2.7.21 has been released.
Associated Post Types are now called “Connections”.
Taxonomies won’t appear selectable in the back end with “Editor” enabled as a supported feature.